Building an OCR using YOLO and Tesseract
In this article we will learn how to make our custom ocr (optical character recognition) by using deep learning techniques to read the text from any images.
For instance:
Take the VOTER Cards or PAN Card images for text detection and text recognition.before this, lets understand what is OCR.

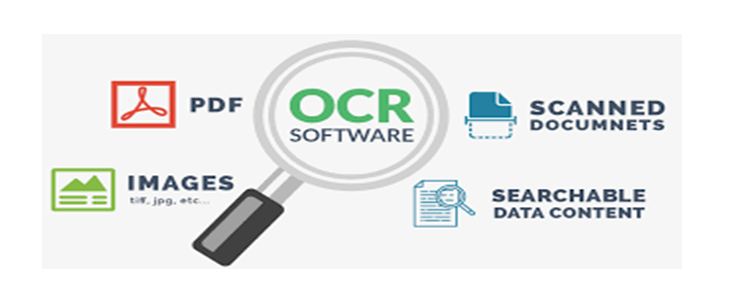
What is OCR?
The OCR (optical character recognition) is used to read the text from any images or any scanned documents or any hand written papers or printed papers. This is mainly used in any kind of images containing written text into machine-readable text. Now, here we are going to build an OCR which only reads the information from a given documents.

The OCR mainly contains the two major blocks.
They are
1.Text detection.
2.Text recognition.
1. Text detection:
In this our task is to detect the required text from the scanned documents or images, for this you don’t want to read the entire document rather a piece of information like Aadhar or pan card number or credit card number, name and amount. So detecting the required text is not easy and it is a very tough task. but using deep learning we will be able to read the required text from any documents or images.
Text detection and object detection can be achieved in two ways. They are
1.Region based detectors.
2.Single shot detectors.
According to Region based methods, first we have to find all the regions which are having the objects . after finding the objects we can pass those regions to our classifier which gives the locations of particular objects. So it is a two-way process. Firstly, it finds the bounding box and after the class of it. This is more accurate but very slow compared to Single-shot method. The examples of region based methods are Faster R-CNN and R-FCN.
Coming to Single shot method , it will predict the both boundary box and the class at a time and it is a single step process and much faster. And the main drawback of this Single shot method is not able to fing the smallest objects. The examples of Single shot methods are SSD and YOLO.
Here just have look on the tradeoff between Accuracy and Speed while choosing the object detector. Faster R-CNN has the high accuracy and lesser in spped. YOLO is very much fast among all. To decide which one to use, it will totally depends on our application. So here we are using YOLOv3 because,
1. It is very faster.
2. It has good accuracy for this type of applications.
3. YOLOv3 has Feature pyramid network to detect the small objects also.
let’s dive into YOLO
Using YOLO(You only look once) for Text Detection:
YOLO it is a real time object detection network in this there are many versions and the recent one is YOLOv3 and it is fastest version. The YOLOv3 uses the Darknet-53 is a feature extractor. It has a overall 53 conventional layers that’s why it is called as “Darknet-53”. For the classification we are using a independent logistic classifiers with binary cross-entropy loss function.
Training YOLO using the Darknet framework:
In this we are using the Darknet neural network framework for the training and testing and it uses a multi-scale training, data augmentation and batch normalization. And it is open source framework written in C and CUDA and it is fast, easy to install and supports the gpu and cpu also.
To install the Darknet framework just follow the below code. If you are using gpu then mention the GPU=1 and CUDNN=1.

Let’s start building,
Gather Data first:
Data is the most important thing in any machine learning based algorithms.so we have maintains the enough data for the any applications. If you don’t have the sufficient data use the image augmentation to increase the size of our data. Basically image augmentation is by changing the size of the image, color, light etc.
In the data augmentation we are having many models in that we can easily pick any method. For this I would recommend the image augmentation library called Albumentations.
Through internet I collected 50 images of PAN Cards. By using the image augmentation we can create the 100 PAN Card images.
Data Annotation:
After collecting the data the next step is, which is to label it. For labeling we are having the many free data annotation tools available. In this the most commonly used tool is VoTTv1. It is a very simple tool.
Training:
For the training of our ocr we need to modify the config file. You will get your required file in the format “cfg” folder named like ‘yolov3.cfg’. For this we need to change the subdivision, batch size , number of classes and filter parameters. Now we will start our training with pre-trained weights of Darknet-53. For this just click on this below link.
./darknet detector train data/obj.data yolo-obj.cfg darknet53.conv.74
The advantage of the Darknet is it has multi GPU support and that average loss stops decreasing after a certain number of iterations, you should stop training. Once observe the below graph we can see that I stopped at 14200 iterations as the loss became constant.

From the aboce chart we get the best results on the 7500th iterations. So we need to evaluate them by using the mAP(Mean Average Precision) score. Here they are given how to use the mAP score. https://github.com/AlexeyAB/darknet#how-to-compile-on-linux. Choose the weight-file with the highest mAP score. Now we are run this detector on a sample image you can get the bounding box on the detected text which you can easily crop that region.

2. Text recognition:
Till now we have completed the custom text detector implememted for the text detection and now we move onto the subsequent process of text recognition. For this text recognition you can use open-sourced one or you can create your own.
If you are having lot of labeled data we can create our own text recognizer. It will certainly improving the accuracy.in this we are using the Tessaract OCR for the text recognition, only few tweaks the tessaract engine works wonders for our application. In this we are using the latest version of Tessaract4 , which supports many languages.
Installing Tesseract OCR Engine

For the Ubuntu 14.04, 16.04, 17.04, 17.10. For 18.04 you can skip the first 2 commands.for more details about the tessaract just follow the link. https://www.pyimagesearch.com/2017/07/10/using-tesseract-ocr-python/
3. Putting things together:
Once we’ve implemented the process of text detection and text recognition, it is time to combine them to achieve the following flow:
After implementing the text detection and text recognition, it is time to combine both of these to get the following flow.
– First we have to detect the required region from the images.
– Now, we can Pass that detected regions to Tesseract Engine.
– Finally, Store the results your required format.

Let’s observe the above diagram , from that we can understands that the image of pan card is passed to YOLO detector , then the YOLO detects the required text regions and crops that text and take out from the image. Next we can pass those texts one by one to tessaract engine and the tessaract engine reads the text and stores that information. And you can show your results in any form of choice like excel etc… You need to install the darknet by using the following code.
bash ./darknet.sh
Now we can run the ocr with below command.
pan.py -d -t
Finally , we can see the output results in csv format.while checking your ocr you need to change the size of the image. I hope that you are able to understanding the various steps involved in the OCR.