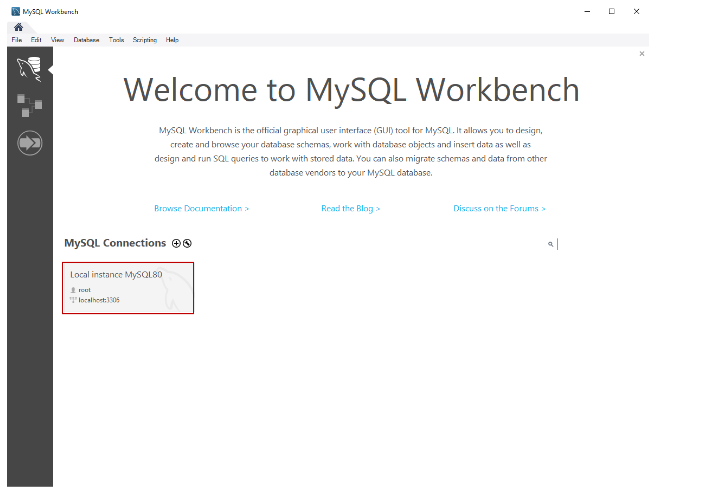
MySQL – Workbench
MySQL Workbench is a cross-platform, open-source relational database design tool that facilitates MySQL and SQL development. This application integrates SQL design, development, creation, administration, and maintenance, as well as offering a graphical user interface for working with your databases.
The MySQL Workbench provides the following capabilities for manipulating database models:
- Create a graphic representation of the process
- The reverse engineering of live databases into models (data modeling).
- Create a script/live database based on the engineering model
- More information
There are several relational database management systems available, including Microsoft SQL Server, Microsoft Access, Oracle, and DB2. There are several advantages to consider when choosing a tool such as MySQL Workbench.
The MySQL database supports multiple storage engines, each of which has its own specifications, as well as other tools. In addition to its simplicity and high performance, MySQL is also very easy to use.
It is also known for being cost-effective. In the community edition, users are free of charge, while in the enterprise edition, a low license fee is charged.
Salient features of MySQL workbench:
In this section, we will discuss some of the key features of MySQL Workbench.

Modeling and design
Modeling is a very effective way to visualize requirements and create databases that can meet the needs of ever-evolving data. The MySQL Workbench allows the creation and manipulation of models, the reverse engineering of a live database into a model, the creation of tables, and the insertion of data into those tables.
It is possible to convert ER diagrams into SQL statements and upload them to a SQL server. It is also possible to create models from a target database or even import SQL files.
SQL develop tool
You can create, manage, and configure connections to MySQL database servers with MySQL Workbench. Additionally, you can use the in-built editor to execute SQL queries on these connections.
Using the Visual SQL Editor, you can create, edit, and run queries. In addition to auto-complete and color highlighters, it facilitates the easy writing and debugging of SQL statements.
Visual performance
MySQL Workbench provides several tools for viewing and improving performance. In the Performance Dashboard, you are provided with a quick view of various performance metrics. Performance reports allow you to analyze the performance of your databases.
Database migration
A database workbench makes migration easier. A variety of databases can be migrated, including Microsoft SQL Server, SQLite, Microsoft Access, and others. You can also configure, schedule, edit, and execute migration projects with this tool.
Connection management
Using MySQL Workbench, you can create, manage, and organize database connections. With MySQL Workbench’s Object Browser, you can visually select tables and columns. The user has the ability to navigate between schemas, select tables and fields, create customized ones, or drop existing ones with ease.
User administration
A major benefit of MySQL Workbench is that it simplifies user management. It is easy to:
- All MySQL users’ account information can be viewed
- Added and removed users
- Permissions may be granted or revoked
- Permissions need to be modified in the database
- The password should be changed
- Auditing to determine who did what and when
Server configuration
MySQL Workbench enables you to view and modify advanced parameters of MySQL servers. Additionally, server logs can be viewed to identify problems faster and track database changes. The MySQL hostname can be specified to specify where to host your MySQL database.
How to install MySQL Workbench:
In this section, we will discuss how to install MySQL Workbench. There is no difference in the installation process for Windows and other operating systems.
- Visit the Oracle website
- From the drop-down menu, select your operating system

Step 1:Community Server should be installed. In order to install MySQL Server, double-click the MySQL installer .exe file. Once you have clicked the .exe file, you will see the following screen:

Step 2:Click the Next button after selecting the Setup Type. There are several types of MySQL, and you must choose the appropriate option to install the MySQL product and features. In this instance, we are planning to select the Full option since it is only necessary to install MySQL Server and Workbench. Choosing the Full option will give you access to more features.

Step 3:Clicking on the Next button will display the following screen.

An installer offers us a warning. We can proceed our set up except putting in the visible studio and python. Click on Yes.

On the Installation screen, you can see the listing of the MySQL products/software that are going to be established on my workstation. Review the listing and click on on Execute.
The installer downloads all the products or software. After that, it installs all the products.

Wait for a few mins. Once the set up manner completes, we are equipped to configure the MySQL database server and different components. Click on Next.

On the Product configuration screen, you can see the listing of the products that want to be configured. First, let us configure the MySQL Server. Click on Next.

We can install either an InnoDB cluster or a standalone MySQL server from the High Availability screen. MySQL’s InnoDB cluster provides high availability. As a result, it uses group replication. I will explain it in more detail in my next series of articles. Since we will be installing MySQL Server standalone, choose “Standalone MySQL Server / Classic MySQL Replication”.
We can configure the following on the Type and Networking screen:
MySQL configuration type.
The type of MySQL configuration determines how much resources should be allocated to MySQL Services based on a predefined set of configuration parameters. There are three configuration options available to you:
1.Development Computer: According to this configuration, MySQL Service is using minimal resources
2.Server Computer: A minimal amount of resources are used by this configuration. It is suitable for installing database servers and web servers on the same machine. MySQL Service is allocated an average amount of resources
3.Dedicated Computer: We use this option when we have created a dedicated MySQL server. MySQL Service is allocated a large amount of resources in the configuration
The server will be configured with minimal resources, so select “Development computer” from the Configuration Type drop-down menu.

Network Connectivity
We can control how clients can connect to MySQL databases in this section. In addition to TCP/IP, we can use Named Pipes or Shared Memory. When configuring Named Pipes / Shared Memory, the Pipe Name and Memory Name must be provided. To connect to the database server, you can also specify the default port. In the firewall, you can also specify a port number to be allowed. Take a look at the image below:

We can set up SHA256-based strong passwords in MySQL 8.0. Choose either Legacy authentication or Strong password authentication from the Authentication Method screen. When using Strong Password Encryption for authentication, ensure that all connectors are updated to the latest version. For authentication, we are preparing to use Strong Password Encryption.

You can specify the password for the MySQL root account on the Accounts and Roles screen. It is necessary to disable the MySQL Root account, which is a default sysadmin account.
other users by clicking on Add user. The MySQL user account dialog box requires the username, the hostname, the role of the user, the type of authentication, and the password. Click Next after creating the user. Take a look at the image below:

Configure MySQL to run as a Windows service. You can provide the desired name and configure it to automatically start the service when the system is rebooted. Additionally, it is possible to specify the credentials under which the MySQL Service will be run. It is possible to select the standard system account or to specify a specific user. Take a look at the following image:

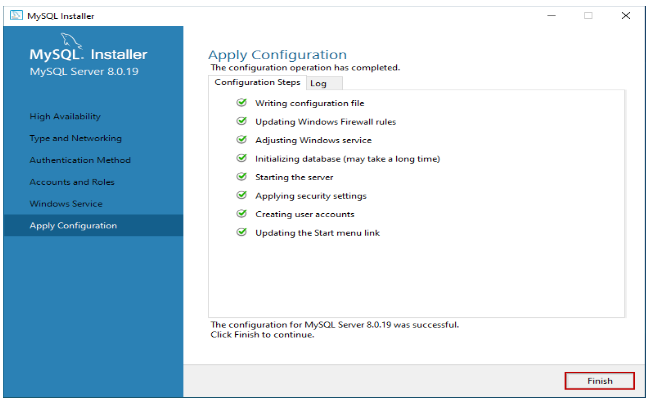
On the Apply Configuration screen, you will see a list of confirmation steps. Once all configuration settings have been verified, click the Execute button.
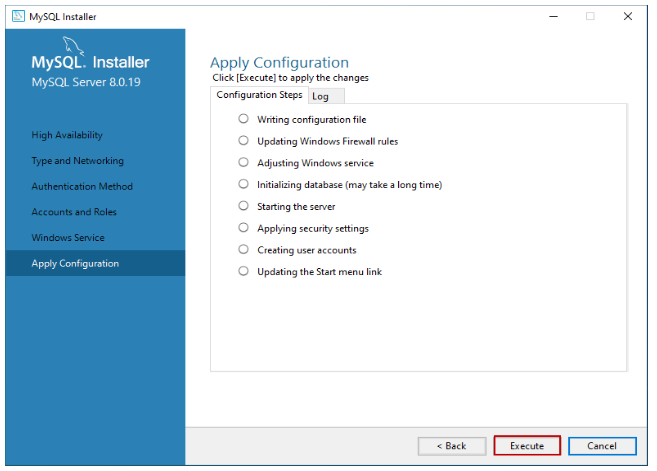
To begin the MySQL installation process. In the “Log” tab, you will be able to view the installation process. After the installation has been completed successfully, click “Finish” to close the installation program.
Install the sample database
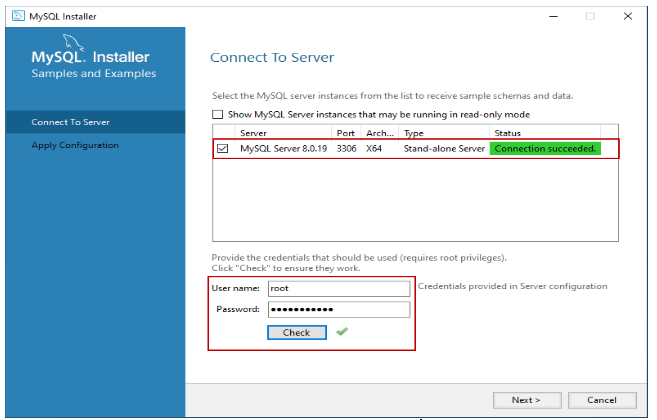
When you select to install all components of MySQL Server (Full Setup Type), the MySQL installer moves to the Sample and Example screen. Provide the username and password of the user who has root/sysadmin privileges and click on Check. Click on next if the connection is established successfully. Take a look at the following image:
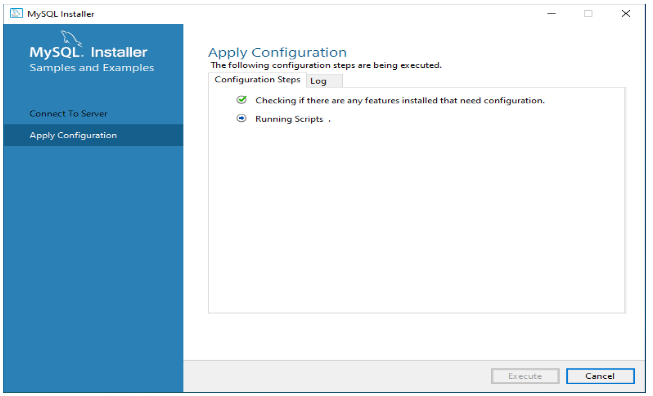
To start the installation of the Sample database, click on Execute on the Apply Configuration Screen. Take a look at the following:
The sample database will be installed once the Finish button has been clicked.
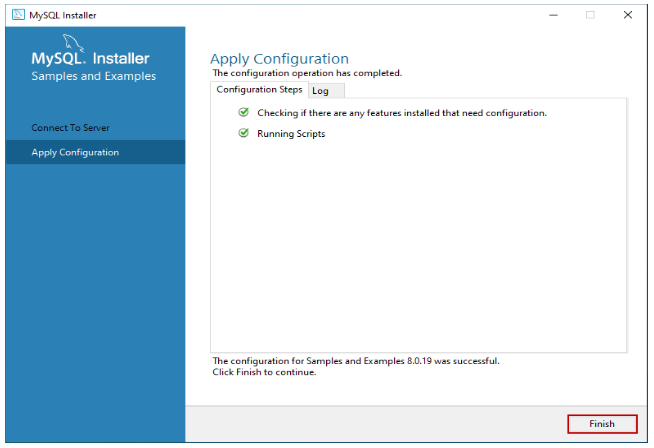
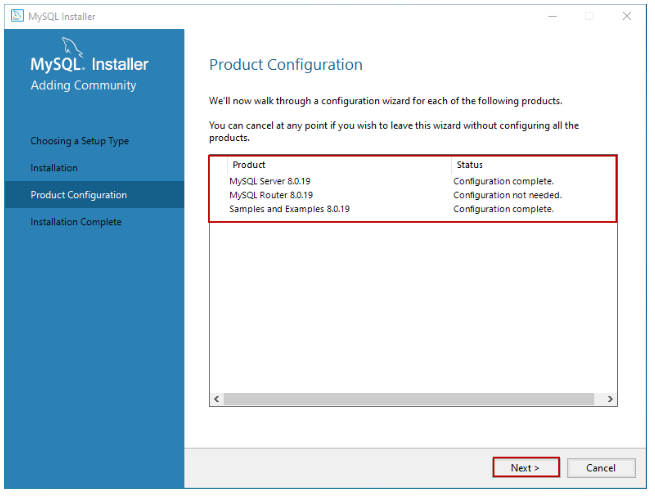
In the following screen, the installer continues to configure the product. In this screen, you can see that MySQL Server 8.0.19, Sample and Example 8.0.19 have been installed. Take a look at the following image:
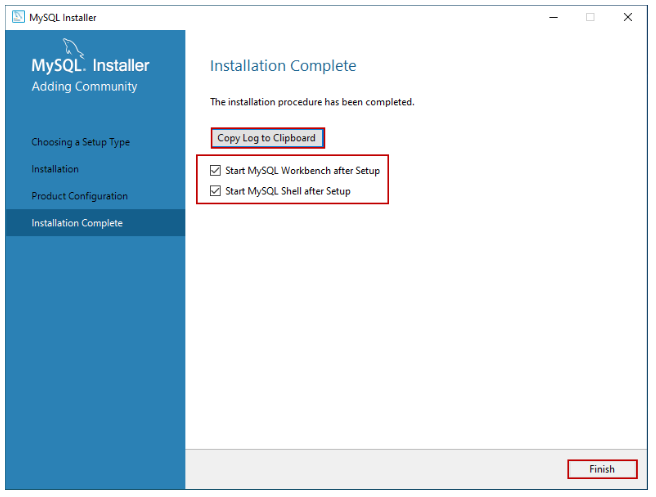
has been completed, you will be able to copy the installation logs onto the clipboard for future review. Additionally, if you wish to begin exploring MySQL as soon as possible, you can select “Start MySQL workbench after setup” and “Start MySQL shell after setup” and click Finish. Take a look at the following image:
Let us connect to the server once the installation has been completed and execute the first MySQL query. Start the MySQL Workbench. SQL Server management studio is similar to MySQL workbench in that it is used to query the database and create objects in the database.
