Power BI – Connect to an Oracle Database
Supported Capabilities
- Import
- DirectQuery
- Advanced options
- Command timeout in minutes
- SQL statement
- Include relationship columns
- Navigate using full hierarchy
Connect to an Oracle database from Power Query Desktop
- In the connector selection, select Oracle database.
- In Server, specify the Oracle Server to connect to. ServerName/SID is the format to use if a SID is required, where SID is the unique name of the database. Use ServerName/ServiceName if ServerName/SID does not work, where ServiceName is the alias you use to connect.
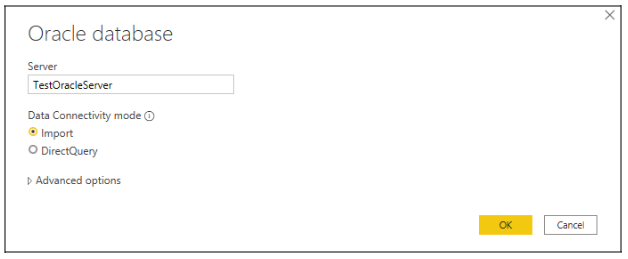
- If you are connecting from Power BI Desktop, choose Import or DirectQuery. In the remaining steps of this example, we will use the Import data connectivity mode.
- If this is your first time connecting to this Oracle database, choose the authentication type and enter your credentials.

- Select the data you require in Navigator, then either load it or transform it.
Connect to an Oracle database from Power Query Online
- In the data sources selection, select Oracle database.
- Specify the Oracle Server in the dialog box that appears. ServerName/SID is the format to use if a SID is required, where SID is the unique name of the database. When ServerName/SID doesn’t work, use ServerName/ServiceName, where ServiceName is the alias you use to connect.

- Choose the name of your on-premises data gateway.
- For the first time you are connecting to this Oracle database, select the type of credentials for the connection. If you plan to use an Oracle account instead of Windows authentication, choose Basic.
- Enter your credentials.
- Select Next to continue.
- You can transform the data in Power Query Editor by selecting Transform data in Navigator.